This is my ultimate delicious nutritious comfort food. It tastes so good, has so many interesting textures and fills and warms the tummy so well. The citrus element is what sets the flavours alight and I just love it. It’s great to cook for vegan friends or dairy/gluten free folk, so I like to whip it out if special dietary needs crop up.

Coconut Braised Citrus Stew

6 servings

Ingredients

Vegan version:

  • 2 tbsp coconut oil
  • 1 brown onion, diced
  • 1 large golden sweet potato/kumara, diced
  • 1 can coconut cream
  • water
  • 1 can chickpeas drained and rinsed
  • 2 tsp crushed garlic
  • 1 tsp grated ginger
  • 1 large lemon, zested and juiced
  • 4 kaffir lime leaves, chopped fine (or zest of 1 lime)
  • 2 tbsp lime juice
  • 1 chopped hot red pepper or 1 tsp chilli flakes or ground chili (more to taste)
  • 1 tsp salt
  • Large bunch silverbeet/chard (or spinach), approx 500g/1 pound, chopped

For the “non vegan” version as above plus:

  • 5 skinless boneless chicken thighs, cubed
  • 2 tbsp fish sauce

Method

  1. Heat oil in a large saucepan, add onion and cook until onion starts to brown
  2. Add coconut cream, fill the cream can with water and add to the pot, add chickpeas, sweet potato and heat until bubbling.
  3. Add garlic, ginger, lemon zest and juice, kaffir lime/lime zest, lime juice, chili (or pepper) and stir through
  4. For non vegan version, add chicken
  5. Add salt (and fish sauce for non vegan)
  6. Cover pot and allow to simmer for 10 minutes, 
  7. Add the chopped silverbeet to the top. Cover and cook for a further five minutes before stirring the silverbeet through. The greenery will lose volume as it cooks, so may be added several batches if it won’t fit in the pot.

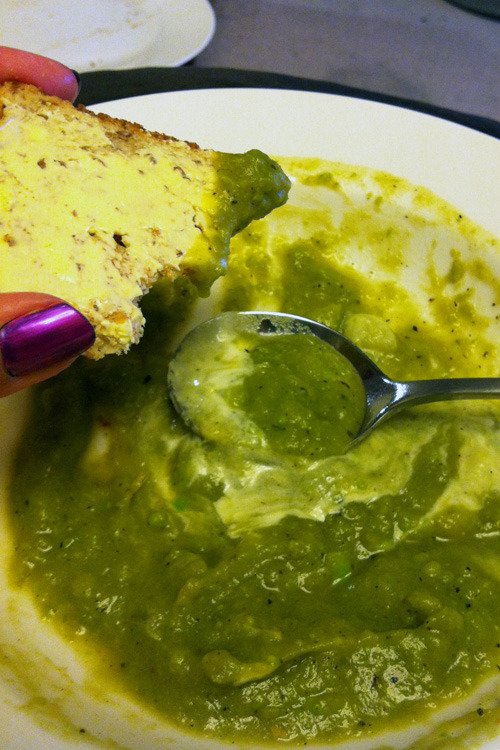
Season with additional salt, fish sauce and chili to taste. Ready to serve – it’s very liquid based so bowls required. 

It could go further served over rice, but there are plenty of starchy carbs in this dish already with the chickpeas and sweet potato.

Garnish suggestions – toasted coconut, fresh chopped cilantro/coriander.


Pea & Potato Soup

Last week I made this soup on a rainy, grey Monday evening. It tasted even better reheated the next day at work with some dry toast for lunch.

This soup will keep well refrigerated for about a week – remember to let it cool completely before you refrigerate it, or the condensation in your container will water it down. I haven’t tried freezing it, but I might do that next time – in cupfuls suitable for work lunches.

Ingredients:

  • 2 teaspoons olive oil
  • 1 brown onion, diced
  • 2 cloves of garlic… squashed (I couldn’t crush them, but that would be preferable!)
  • 2 cups of peeled, diced potato (about 4 medium sized potatoes)
  • 2 and a half cups of frozen peas (minted peas would be okay, but well, minty…)
  • 2 cups boiling water
  • 2 cups stock (I only had chicken stock, but vegetable would be ideal)
  • Salt and pepper
  • Sour cream (for serving) 

Method:

Heat the oil in a large saucepan, add the onions and garlic and cook them until the onion is clear. Browned onion would be fine, but I’d advise against going too far in that direction because I burned mine a bit, and it made the soup kinda grey…

Add the potatoes, peas, water, and stock. Bring the mixture to the boil, then reduce to a medium heat, cover the pot and simmer for about ten minutes or until the potato is tender.

At this stage, I took the pot off the stove and roughly blended the soup with a hand-held “whizz stick”/bamix machine with blades. The idea is to blend it to the consistency you expect of soup – I left mine a little chunky (yum!).

If you don’t have a whizz stick, you can let the soup cool a bit and then put it through a blender in batches, then return it to the pot and reheat it on the stove.

Add salt to taste – about a teaspoon in my case. Better too little than too much!

I served mine with toast, salt and white pepper, and a teaspoon of sour cream.


Delicious Crumble

Inspired by Amber’s spot-on post about apple crumble, the chill in the air, and my mother dropping off some home-grown organic apples and feijoas, I made this apple and feijoa crumble tonight.

I had plans of using up all the feijoas, but they were a mission to peel so I only put in a few – it’s suprising how strong the flavor was though – just right in my opinion.

Amber’s recipe is super simple and undaunting, I was a little tricky and tried some other things with it to great effect. This is the first time I’ve tried making apple crumble, it’s not a big dish in my household (but it should be!). I remember loving it at boarding school though and when my grandmother used to serve it.

It’s girl guide biscuit time (meaning, there are some surviving in my cupboard) so I added half a packet to the crumble (amazing!).

Ingredients

  • 8 apples of any variety
  • 5 small feijoas
  • 1 cup water
  • 2 tbsp brown sugar
  • 1 tbsp manuka honey
  • ¾ tsp ground cardamon
  • ½ tsp cinnamon

For the topping:

  • ½ cup melted butter
  • 1 cup sugar
  • 1 cup standard plain flour
  • ½ packet crushed plain biscuits (girl guides if you have ‘em!)

Preheat your oven to 180 degrees celsius. Boil water. Peel, core, and chop apples roughly into small pieces. Peel and chop feijoas. Put the fruit in a saucepan with ½ a cup of hot water and cook on a high heat until boiling. Reduce the heat slightly to a simmer and stir occasionally.

Add the sugar, honey and spices and continue to stir occasionally to ensure the mixture doesn’t burn on the bottom of the saucepan. Add more water if necessary and continue to simmer (I think mine was on the stove about 20-30 minutes all up).

In a bowl, melt the butter then add sugar and stir. Add flour and combine. Crush the biscuits to a fine texture (or blend them) and stir into the butter mixture.

The fruit should be slightly syrupy but still have a fair amount of liquid – I found this was absorbed up into the crumb topping where it caramelised slightly in baking.

Pour the fruit mixture into an oven-safe dish, then spread the crumb mixture evenly on top. A gap at the top of the dish is great – the fruit will continue to boil in the oven and spillage is no fun to clean up.

Place the dish in the center of your oven for about half an hour – until the crumble topping is golden brown.

Serve warm with a scoop of vanilla ice cream or cream – be warned, it is really tasty!